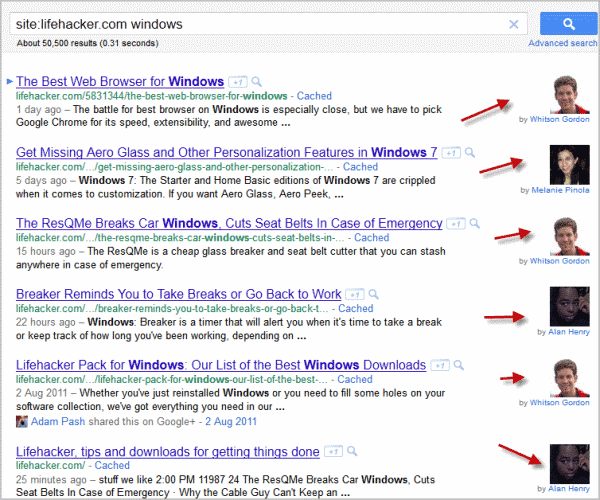
Maybe you have spotted one of the recent changes on Google search results pages already. Some website listings, Lifehacker’s for instance, display an author profile photo next to their listing in the Google search results. This only happens on pages where a single author can be easily identified, which is the case for most blog posts. The question is: How can you get the same treatment?
It is thankfully not super complicated to configure your site to be compatible with the new author photo snippets that show up on Google Search. It is at this point in time however not guaranteed that your photo, or a photo of one of your authors, will appear in Google Search. It is rumored that Google has enabled that feature only for selected blogs and sites.
Nevertheless, it does not hurt to add the code to your site and Google Profile. And if your site gets picked by Google, you can expect a higher CTR (click-through rate) than sites without an author profile photo in Google.
Lets take a look at how it looks like in the search engine if it is configured correctly and enabled by Google:

Here are the steps that you need to undertake:
Creating An About Author page
You first need to create an about author page on your website. You then need to link to that page from all posts that this author writes. The link needs to use the rel=”author” parameter. How it is added depends largely on how the author information are posted on the post pages.
Here on Ghacks, the code looks like this:
<p class=”tags”>
Author:<a href=”http://www.ghacks.net/author/martin/” title=”Posts by Martin Brinkmann” rel=”author”>
Martin Brinkmann</a>
Adding the code can be an easy task on single author blogs, but a bit more complicated on multi-author blogs. The best way to add support on those blogs and sites is to install a plugin like Allow REL= and HTML in Author Bios that adds the support.
You are not yet finished though. The about author page needs to exist for every author on the site. The actual page can contain any kind of information. One important part though is that it needs to link to the Google profile of that author. The link to the Google profile needs to contain the parameter rel=”me”.
<a rel=”me” href=”http://profiles.google.com/ID”> Author Name </a>
Linking Back from Google Profile
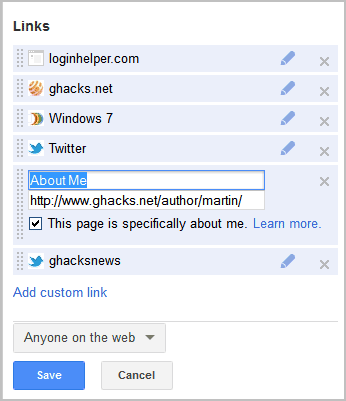
In the last step, we need to link back from the Google profile to the about page on the website. Open your Google Profile, click the Profile icon at the top and then the Edit Profile button at the top. Locate links on the right side and select the Add custom link option.

You need to link to the author page on the website, and enable the “this page is especially about me”. You also need to make sure that a photo is added to the profile.
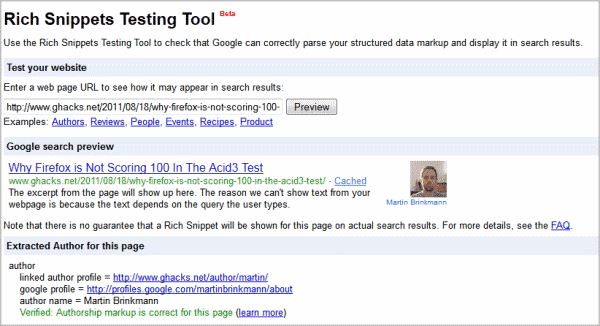
Testing the rich snippet
Open the rich snippet testing tool and enter an url from your website that is linked to a single author (a blog post for instance).

If you see the author photo next to the listing, you have configured the author profile photo support on your site correctly.
To summarize:
- Create an about author page on your site. Link from that page to the Google Profile of that author with the rel=”me” tag. Link the author’s blog posts on the website with the rel=”author” tags to the about author page on the blog.
- Add a photo and a link to the author’s about page on the Google Profile of that author. Make sure the “this page is especially about me” box is ticked.
- Check for correct implementation with the help of the Rich Snippet Tool.
© Martin Brinkmann for gHacks Technology News | Latest Tech News, Software And Tutorials, 2011. | Permalink | Add to del.icio.us, digg, facebook, reddit, twitter
Post tags: author profile, Google, google profile, webmaster, wordpress

You must log in to post a comment.