
Virtual memory is a throwback to Windows of old, when the physical memory available to a computer was severely limited. Essentially it uses a chunk of space on your computer’s hard disk as a memory swap file. Unfortunately, Windows has always been terrible at managing this file allowing to dynamically grow and shrink depending on what the operating system needs at the time.
You computer now may well have 2/4/6 or even 16Gb of RAM, but Windows is still using the swap file, primarily now for application compatibility. With this file always growing and shrinking in size on your hard disk it’s building up a fragmentation problem that will eventually slow down file access to your hard disk and that, potentially, could lead to data corruption.
Now, both of those scenarios with modern hardware are worst case, but it’s always a good idea to manually manage the Windows swap file. Why do I say this? Because while I can’t guarantee an unmanaged swap file will cause slowdown and data corruption, I can positively guarantee that a properly managed swap file won’t.
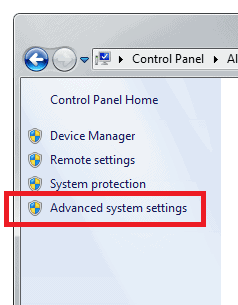
You access the swap file properties in the Control Panel by selecting the System panel. In the left hand panel (Vista and Windows 7) click the Advanced system settings link.
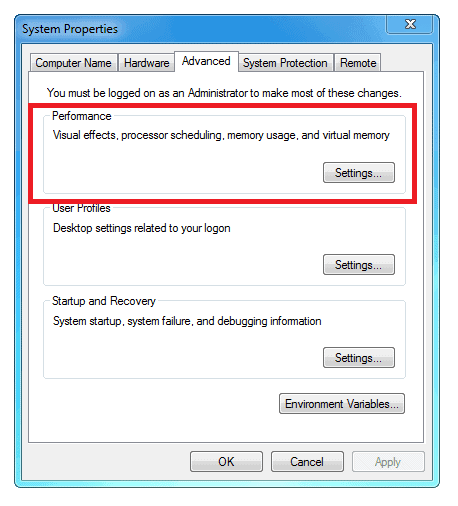
In the Window that appears, you’ll see the Advanced tab open by default. In the Performance section you need to click on the Settings button.
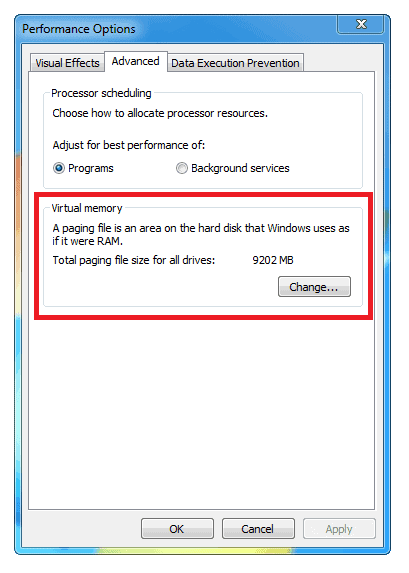
At this point a new Window will appear. Under the Virtual Memory tab click the Change button to set the virtual memory manually.
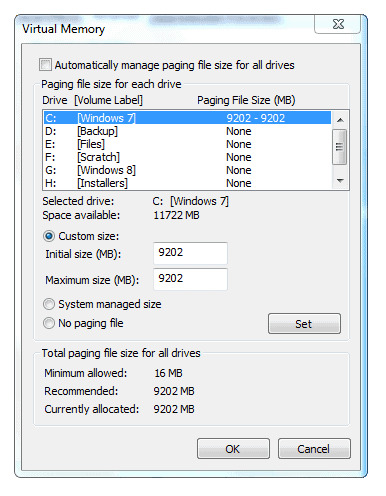
At the next Window (seen below) there are several things you need to do.
- Untick the Automatically manage paging file size for all drives option.
- Choose the Custom Size option
- Set both the Initial size and Maximum size options to the Recommended value at the bottom of the window. NOTE: both values must be identical.
- Press OK to finish. The changes will take effect the next time you restart your computer but there’s no need to do this immediately.
Some people have questioned whether you should keep your paging file on the same disk as Windows is installed in your computer if that hard disk is an SSD. The reason for this is that a paging file makes many millions of read and write requests over the lifetime of that copy of Windows, many more times that of any other file. The argument is that this can significantly reduce the lifetime of your SSD which has a maximum lifespan of so many read and write requests.
Conversely, other people will say that moving the paging file away from the SSD will slow down Windows and undo some of the good of having it installed on an SSD in the first instance.
This is a decision you’ll have to make for yourself and it comes down to a personal choice. I’m not convince that moving the paging file away from Windows will affect performance adversely and on my own computer the power management powers-down the hard disk after a period. This means that when I come to access a file from it I always suffer a delay while the computer spins it up again. Having the swap file on the hard disk and not the SSD would get around this secondary issue.
On the image above you can see on my own computer the Windows 7 partition is highlighted. It’s here that I’ve got my own swap file stored. Before moving the file to another disk simply click on the appropriate hard disk or partition in the list that you see. The next time you reboot the swap file will be moved to this other disk instead.
© Mike Halsey (MVP) for gHacks Technology News | Latest Tech News, Software And Tutorials, 2011. | Permalink | Add to del.icio.us, digg, facebook, reddit, twitter
Post tags: ssd, swap file, virtual memory, Windows
You must log in to post a comment.